Independent and Secure Chat
16 September 2021
Following on from the article I wrote some time ago titled “Platform Independent Chat” we’re going to look at how to use an IRC client to connect to an IRC server and chat, and in a future article, how to set up your own IRC server.
There are free, open source IRC clients, and naturally paid-for commercial ones too. I can’t vouch for all the IRC clients out there, so I’ll list a couple for each of the main operating systems (I shall skip fellow Linux users as I think most people capable of using it are likely not in need of an article like this), and pick one to demonstrate installing and connecting with.
For Windows, there are the following:
HexChat (Free/Open Source)
mIRC (Commercial/Proprietary)
HexChat is decent, free, secure and pretty easy to use, and we’ll be using that for our instructions later. mIRC is also good but not free. It has been around since the 90s and has a large userbase (in the IRC community that is) but for casual users may not be worth paying for.
For MacOS there are these:
LimeChat (Free/Open Source)
Textual (Commercial/Open Source)
LimeChat is pretty good, open source and free. Textual is a paid-for application but if you’re prepared to compile it from the source code yourself, you can use it for free. If you’re capable of doing that, you probably don’t need this guide :)
For iOS there are these options:
Colloquy (Commercial App)
LimeChat (Commercial App)
Apple enforces strict limits on applications for iOS. Very few applications qualify for background data or for exemption from automatic suspension. Mostly with chat applications, Apple’s stance is that those applications must be implemented with push notifications. As the IRC protocol does not include Apple’s push notifications (of course it doesn’t, it’s a general platform agnostic protocol as it should be) this means IRC less convenient to use on iPhones as you’ll get disconnected as soon as you switch to another app. That being said, it can be done, albeit with regular connecting/disconnecting. I can’t vouch for Colloquy, but I have used LimeChat and it’s OK.
For Android there’s these:
CoreIRC (Commercial App)
IRC for Android (Commercial App)
Google is a bit less strict than Apple, but similar issues apply so connections are not going to be stable long-term. I can’t vouch for either of the apps listed, but you might find them useable.
Obviously there is the issue that mobile devices are probably already compromised simply because Apple and Google (especially Google) like to spy on you. If you’re already using a mobile device for your comms then this is perhaps not news to you, or a huge concern, but as we’re looking at platform independent and secure chat, it is just worth noting the relative security of the various devices and operating systems.
So we shall start with HexChat, installing on Windows and connecting to an IRC server. You can download the installer from this page. Ideally you will want the “Windows 7+ 64bit Installer” unless you’re running the 32bit version of Windows in which case get the 32bit installer.
It’s a fairly small file by today’s standards, around 10MB and if you run it after it’s downloaded, after allowing it to make changes to your PC if asked by Windows, you should see the “License Agreement” page…
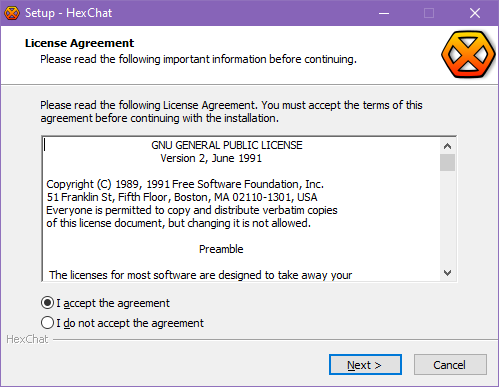
You can accept that, click “Next >” and then you’ll be asked for the “Select Destination Location” which is where it will be installed. The default location is fine. Clicking “Next >” again gets you the “Select Components” to be installed list. The default selection is fine for now. After another click of “Next >” there is the option to tick a box to install HexChat in “Portable Mode”. If you’re a more advanced user that wants to install this on a USB drive or something like that, you’d tick this option. If you did want to do that, you’d have obviously chosen a specific install location at the start, but for now as you chose the default install location, which is normally a folder that has strict write permissions enforced ticking this may cause you problems, so just click “Next >” again. You should then see this…
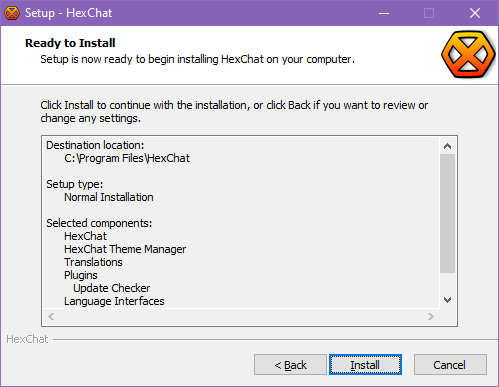
You can then click “Install” and off it goes. Once that is completed you should see this…
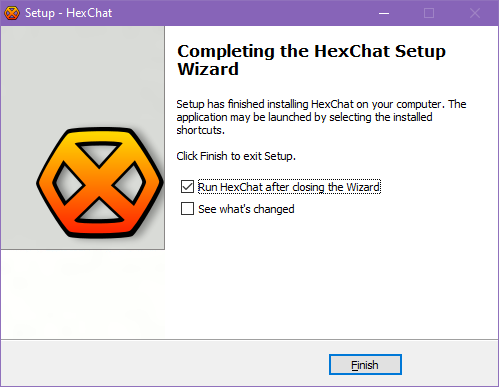
With the box ticked to run HexChat, click “Finish” and you’ll see something like this…
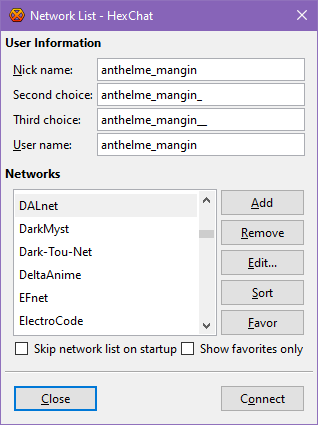
You can change the names at the top. The reason for the second and third choices is because on any given IRC server you cannot use a nickname that is already in use. Some networks use services to allow you to register a nickname, protected with a password so that nobody else can intentionally or inadvertently be mistaken for you. In those cases, depending on the server, you might want to use an email address that isn’t your main one. There are plenty of free email services out there, obviously some more privacy conscious than others. If the nickname you choose is in use on the server you connect to, HexChat will attempt to switch to your second and third choices, if needed. If they are in use too, you’ve be notified by the server and asked to change it manually.
As you can see, there is a pre-populated list of public IRC networks there, or you can add your own. We shall join a public one for now, and add another server to connect to later.
You can see “DALnet” on the list, so after entering your chosen nicknames/username (these can be changed easily any time) click that to select it, and click “Connect”. Sometimes connecting can take a few seconds depending on how busy the servers are, and by default you won’t have an “Ident” server set up, so that can add a few seconds to your initial connection time. Once connected HexChat should display something like this…
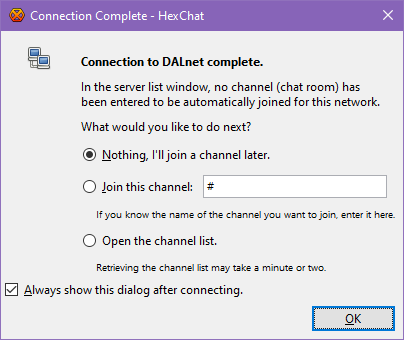
For now, untick the box that says “Always show this dialog after connecting” (it is ticked by default like the image) and make sure “Nothing, I’ll join a channel later” is selected, then click “OK”.
You should then see something like this…
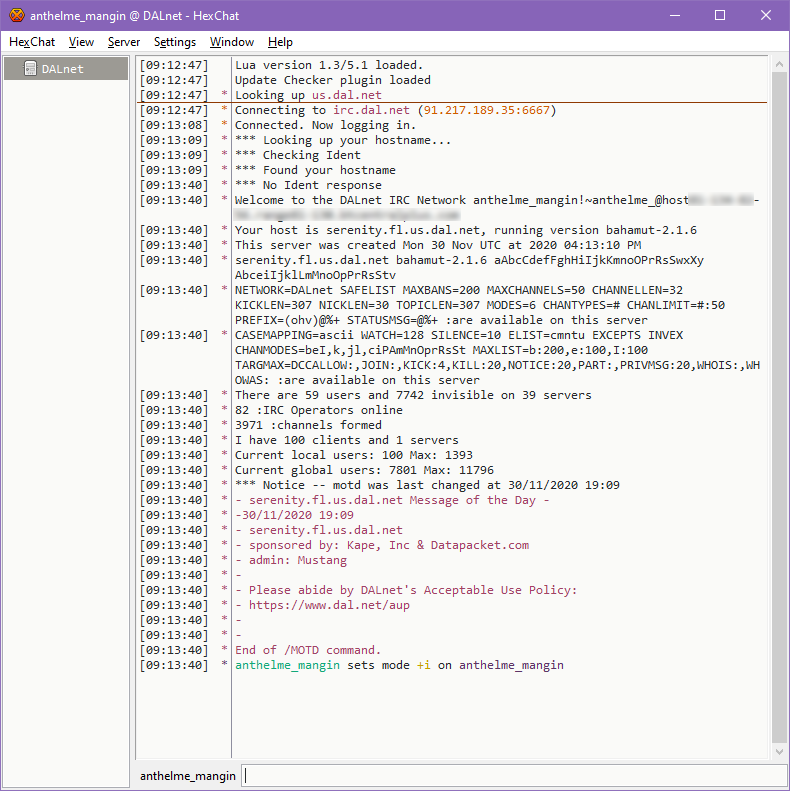
The blurred out bit is my connection details. Some networks provide host-masking so that other IRC users can’t see where you are connecting from. We’ll discuss those things another time.
Joining a channel is as simple as typing: “/join #channelname” which will make you join a channel called “channelname”. We shall join a channel called “corruptedsystem” by typing “/join #corruptedsystem“…
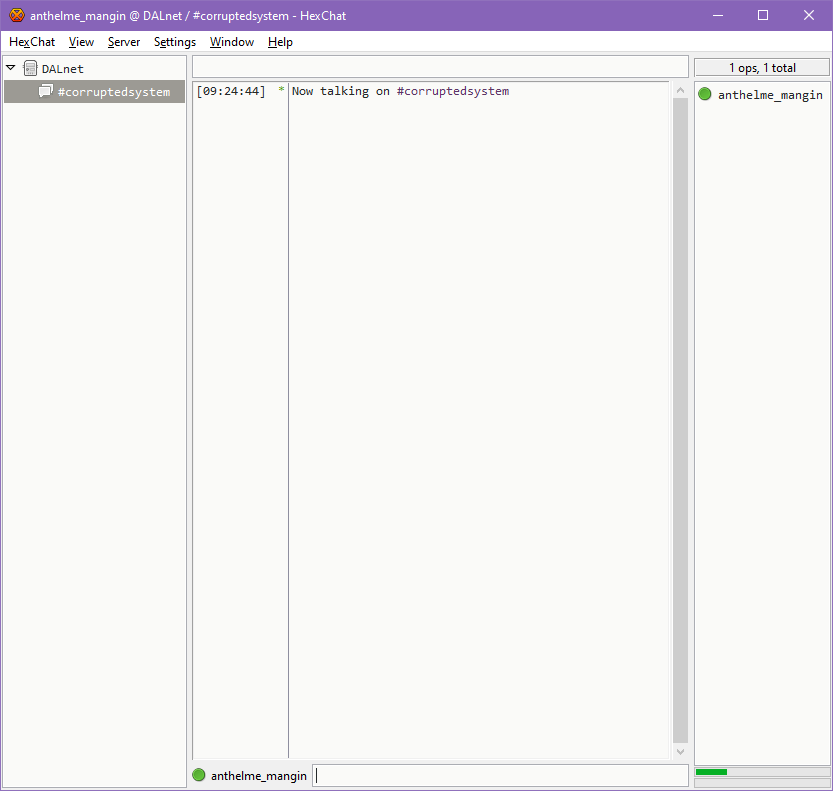
As the channel “corruptedsystem” didn’t previously exist, or if it did everyone left, it is created by me joining it. As such, I am an “op” or channel operator. This gives you the privileges of being able to set channel topics, add other user as operators, kick and ban users and so on. For IRC servers that have management services there is the ability to register your channel, as well as your nickname. You can assign roles permanently to regular users who have also registered their nicknames.
It really is as simple as that. The box at the bottom is where you type your messages. The list on the left is the networks you’re connected to, and the channels you’re in, and the list on the right is the list of users in the channel you’re currently looking at. To change your nickname just type “/nick newname” where obviously “newname” is the new nickname you want to use. If it is in use, or protected by registration you’ll be notified to either identify, which you can if it’s yours, or change it again.
There are other things like the “action” command that you use by typing “/me” followed by something like an action, which then appears like this…

Now we shall see how to set up a connection to an IRC server that might be less public, or at least not included in the default list that comes with HexChat.
In the main window, if you click the first item in the menu along the top-left labelled “HexChat”, you’ll see this…

Click “Network List” and you’ll see the initial dialog we saw…

This time we’re going to add a new network, so click the “Add” button and it will add a new entry into the list, that by default will show as “New Network” but you can obviously edit that. Just for example, we shall set up a connection and then connect to the LostIRC network. Change the text that says “New Network” to “LostIRC” and then making sure it’s selected, click the “Edit” button. You should see this…
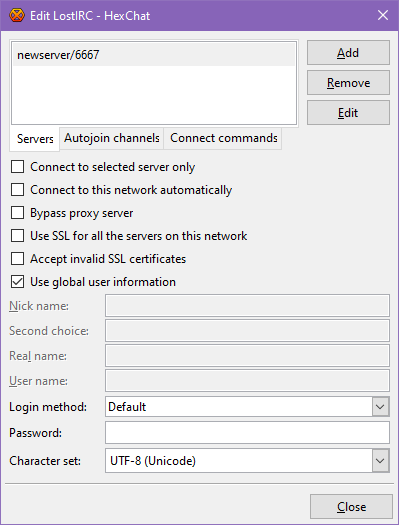
For all networks you can set up, you can add multiple servers as most of the big IRC networks run multiple servers that are all connected to handle the amount of users they have. For now we are just going to add one, so if you click the line that says “newserver/6667” or if it is selected, click the “Edit” button on the right, the text becomes editable.
LostIRC supports encrypted connections but their SSL certificate has expired. This doesn’t mean it’s not encrypted, it just means the certificate issued by the industry that has commercialised the verification of SSL encryption to domain names has expired, presumably because the admins of LostIRC didn’t want to pay for something that doesn’t really add anything to the security.
Change the “newserver/6667” text to “freedom.lostirc.org/+6697”. The part before the / is the hostname of the server, the bit after is the port to connect to, and the + denotes this is an encrypted connection. If you try to connect to port that expects an encrypted connection and forget the +, you’ll get an error. As the LostIRC SSL certificate is expired, we also need to tick “Accept invalid SSL certificates”. In this context, “invalid” can mean expired or a self-signed certificate. It does not mean it’s not encrypted though, just not “verified” to be specifically for the domain name you’re connecting to.
As often with private IRC servers you’re connecting to IP addresses rather than hostnames, to use encrypted connections you can’t have a valid SSL certificate anyway, as they only work with domain names, so the options to allow “invalid certificates” is very useful and nothing to be concerned about.
So once you have made those changes, your network edit dialog should look like this…
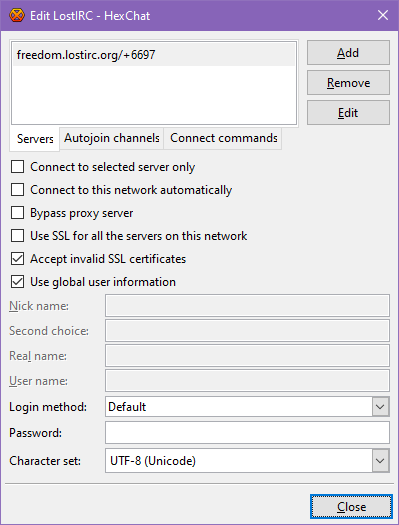
Some networks are protected by a password, so only users that know the password can connect. The “Password” box in the dialog above is where you’d put this if you were going to connect to a server that is password protected. Some servers also allow you to password protect individual channels too. All useful things in a world where privacy is becoming a thing of the past.
You can now close this window, and then with LostIRC selected in the “Network List” dialog, click “Connect”. After connecting you’ll see all sorts of connection info and a “Message of the Day” from the LostIRC admin team, informing you of policies, useable client ports, contact info etc. and they also run nickname and channel management services, so you’ll see at the bottom there’s a message from “-NickServ-“…

As you can see, it is quite helpful and explains how to do this. If you get stuck, you can always type “/msg nickserv help” and you’ll get a response that lists the things you can do, and how to get more detailed help for each function. The same goes for ChanServ, the service responsible for managing channel registrations. Most IRC networks that run services use the same or similar systems, so this is useful across most networks that run services.
Other than that, LostIRC like all the others works just the same. You can join channels, chat, leave, and you can private message individual users too although generally the view is (especially on public networks) that unsolicited private messages constitute spam and should be agreed upon beforehand. Common sense stuff really.
That’s about it really. For the record, DALnet and LostIRC networks used as examples are just that. This is not an endorsement or anything of the sort for those networks, likewise I am not criticising them either. There are literally hundreds of IRC networks out there, of varying quality and of course, some with less content moderation than others.
Soon I will publish an article on how to set up your own IRC server so you can easily manage your own private chat network for whatever reason you like.